Publish static website to azure
publish static website to azure
the following doc will show you how to configure and deploy your static blog to azure. it assumes you already followed the directions in link_to_azure_docs
build static site generator
bundler exec jekyll build
save output path for azure
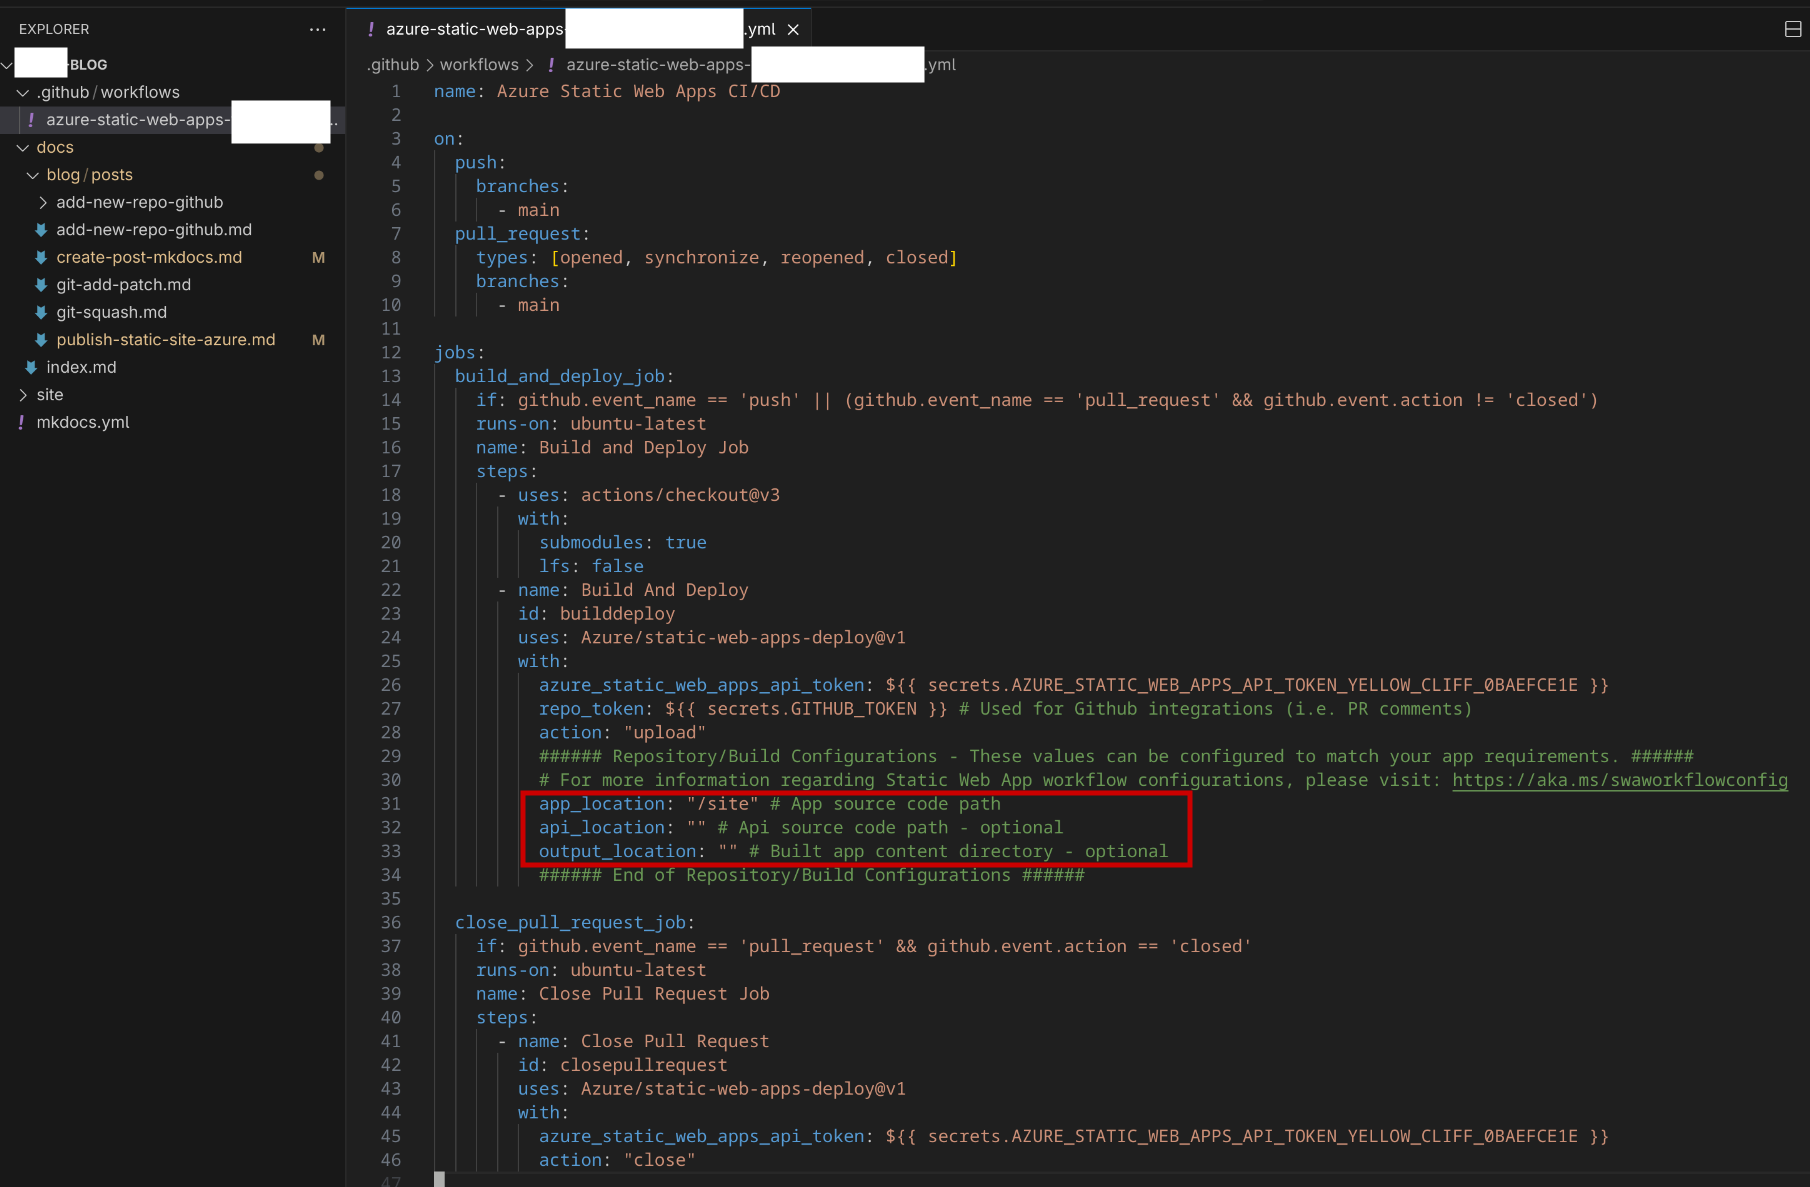
- after running
bundler exec jekyll buildit generates an output folder “site/”. - you need to modify .github/workflows/azure-static-web-apps-[YOUR_APP_NAME].yml
make custom domain changes in azure
Follow the steps in the two sections below to configure and sync both cloud provider and dns provider domain configs.
Cloud Provider (Azure)
- Go to “Custom domains” tab on the left under “Settings”.
- Click “+ Add” then “New Custom Domain on other DNS”
- Enter “Domain name”, i.e “www.eltonmurillo.com”
- Select “Hostname record type”, I chose “CNAME”
- It can take up to 48 hours for DNS entry changes to take effect.
DNS Provider
- Go to your DNS provider
- Under Advanced DNS in my case, try to find “HOST RECORDS”
- Go to “ADD NEW RECORD”, then add
- Type: CNAME Record
- Host: www
- Value: green-red-blah.2.azurestaticapps.net (should match the “Auto-generated” name from “Custom domains tab” in Cloud Provider)
- TTL: Automatic
- Done!